Browsing Category

Gardening

Frugal/ Gardening/ HOME/ Homemaking

My Simple Potted Plants

Follow New Nostalgia

SIMPLE-POTTED-PLANTS

I kept my potted plants simple and cheap this year! My energy has been down and I really didn’t want to spend a lot of money on plants. I’d rather save it for making fun summer memories with my girls!

Here is what I did:

DALIAS

2 Green pots of Dalias to greet my guests at the stairs by my front porch

Herb-Basket

1 Galvanized Steel Bucket holding herbs and a Mother’s Day gift from my Mother-in-Law

SPIRAL-GRASS

1 pot of my favorite funky spiral grass named Corkscrew or Juncus effusus ‘Curly Wurly’ that I plant every year.  It is so easy to keep happy and I love how fun it looks.

1 pot of plain jane red geraniums (pictured above).  They are the cheapest way to add color and take very little care.

SNAP-DRAGON-1

1 pot of snap dragons.  They were on sale and I wanted to add a pop of yellow to my backyard.

All in all, I only spent $25.00 for potted plants for both the back and front yard.  Not bad, huh?  They are nothing fancy, but they sure make me happy and make our little yard look thought of and taken care of.

……………

What did you plant this year? Do you plant the same types of flowers every year?

DIY/Crafts/ FUN/DIY/ Gardening

11 Ways To Start Thinking Garden

Time-To-Garden-2

Grow Food Indoors via Ebay

{microgreens, sprouts & more!}


Simple Painted Rock Plant Markers

{could not find the link to these, but they were too cute to not share! Could use a white or silver Sharpie}


The Ultimate Seed Starting Guide via Garden Therapy

{this truly is the ultimate seed starting guide.  Click through for some awesome inspiration and how-to’s!}


Using Tubs As Greenhouses via Garden Web

{use paper cups instead of styrofoam to be more eco-friendly}


$_3


Herbs You Can Grow Indoors via Empress Of Dirt

{there is nothing like having something green and edible indoors, even while it is cold outdoors}


Time-to-garden-collage


Use Coffee Filters To Line Flowerpots via This Old House

{could even double up for extra protection. Less mess!}


Start Seedlings In Egg Cartons Via Planet Forward

{love this simple way to recycle}


Grow Sprouts  via The Thrifty Couple

{grow sprouts in a sunny windowsill indoors}


Square Foot Gardening via New Nostalgia

{I just love my square foot garden. This picture was taken of  me right before I was diagnosed with stage 3b breast cancer. Oh how life changed! So thankful to be here for another garden growing season!}


letterbox-garden-tools1

Set Up A Mailbox In The Garden To Store Tools via Home and Garden

{I think this idea is great.  It would keep tools handy and protect them from wet weather.}


Plants-In-Mason-Jars

How To Grow Plants In Mason Jars

{you know I had to include something with mason jars! I grow succulents in mason jars and they are wonderfully happy!}

………….

What about you?

Are you ready to start gardening?  Is it cold where you live or are you able to work the dirt now?

Gardening

Square Foot Garden Update

Square-Foot-Garden-Update-2014

I am seriously behind in updating you on the progress of my Square Foot Garden!  It has been another great year of watching tiny seeds and seedlings become big beautiful plants full of heathy goodness for my family.  This process never ceases to amaze me, especially when I am quite the neglectful gardener.

Square foot gardening takes so little work.  The soil mixture is super absorbent which is quite forgiving of my infrequent watering.  It also takes just one bag of compost each season, which gives my plants all the nutrition they need for the season.  I don’t fertilize at all.  Oh..and weeds?  They do not exist in a square foot garden.  There is no room for them.

IMG_9141

I ate the above tomato on my favorite Tomatoes On Toast.  The cucumber is going into this Sweet & Sour Dilled Cucumbers recipe…one I cannot wait to try!

Square-Foot-Garden-pallet

The last time I wrote about gardening, it was spring and my garden looked like the above pic.

Now…it looks like this:

IMG_9107

Whoa, right?  Amazing.  Those tiny swiss chard plants have been growing leaves bigger than my head.  They are great for juicing, blending into green smoothies.  Basil is sitting pretty right next to it, and will be made into pesto this week.  There is dill in there, taller than my waist.  My cucumbers are super happy and just keep growing up, up, up and producing much fruit.  I used a pallet as support for my cuckes and it has worked great. There is a pepper plant in there…which is hard to see.  I replaced kale with baby pumpkin after the cool weather growing season of spring.

Speaking of kale…I grew a ton of it, but was very disappointed that squash bugs got to it.  This is my first time dealing with squash bugs and they are nasty little things! They lay a bazillion little eggs to the underside of leaves.  I spent a few evenings out there with duct tape, dabbing at those dumb eggs.  I won the battle without insecticide, but they ate most of my kale and one summer squash plant before I won.  They have tried to get to my baby pumpkins, but I was not having it and drowned the few adults I found and then went after their eggs with my weapon of choice–good ol’ duct tape.

square-foot-garden-ladder

The above picture is my second 4×2 bed, full of spring time plantings of kale and chard.

IMG_9108

I replaced the kale with tomatoes, pepper, more swiss chard and a squash plant.  All have done beautifully except my squash plant.  May he RIP.

Cucumber-2

I planted just one cucumber plant, and it has kept us in supply of cucumbers for all of July and August, and it is still producing.

IMG_9110

My tomatoes are not as productive as last year, but still holding their own and doing just fine.  Ahhh…I’m so gonna miss the deliciousness of a still-warm from- the- sun, vine-ripened tomato.  I just made freezer salsa, which made my entire family very happy!

Square-Foot-Garden-Chard-2014

So much leafy beauty and texture!  The red veins of this Rainbow Chard is just breathtaking.

IMG_9145

The vine of mini pumpkins is just going crazy and taking over my deflated wheelbarrow.  I can’t wait to use them as fun fall decorations in a week or so.  I envision large glass vases full of mini pumpkins adorning my dining room table.

——–

What about you?  Are you a gardener? Do you want to be? What flourished in your garden this year?  What bombed?

———–

More on Gardening From New Nostalgia:
Gardening/ Uncategorized

Square Foot Garden 2014

Square-Foot-Garden-Swiss-Chard

I have been in gardening heaven lately.  My Mother-in-Law came and weeded all my landscape beds which left me time to do the fun stuff–like get my square foot garden going!  Our little yard is slowly becoming a fun haven for our family, and this year we have spent more time than ever out there.  I’ve even been napping in our new hammock.

I’d like to encourage you to do what you can with what you have.  You don’t need a huge yard or perfect grass to create an outdoor space to spend time in.  Just mow and clean it up.  Add touches of comfort slowly, and let go of perfection.

My yard is so small that I didn’t think I’d have room for a garden, but thanks to square foot gardening, I am able to grow lots of herbs and vegetables for my family.  We have 2 4×2 beds–yep, super small–but you won’t believe what I can fit in there!

Our SFG’s are in a landscape bed along the east side of our house.  It has been a great spot, and uses space that would otherwise go un-used.

Square foot gardening is amazing and so very easy.  Weeding is almost nonexistent in a SFG, I’ve had mine for 5 years now and I’ve pulled maybe a handful of weeds in that amount of time…no joke!  Watering is also very minimal.  The key is the soil mixture, I followed the Square Foot Gardening book to a T and it has been amazing.

SQUARE-FOOT-GARDEN-BASIL

Here is what happened in the garden in the month of May, 2014:

Planted Mid-May

Kale – 8

Swiss Chard -8

Basil -1

Dill-1

SQUARE-FOOT-GARDEN-KALE

BABY-RAINBOW-CHARD

Planted-Late May

Tomatoes -3

Cucumber -1

Summer Squash -1

Mini Pumpkin -6, going to thin once they sprout

 POT-OF-HERBS-COLLAGE

I also have an herb pot on my front porch:

Planted Mid-May

Basil

Dill

Parsley

A Patunia for pretty

—————-

 I used mint as the focal point of 2 of my flower pots, I kept the mint in its pot but took off the bottom, hoping the sides of the pot will help contain it as mint can be a bully & space hog!

Planted Mid-May

Mint

Square-Foot-Garden-pallet

square-foot-garden-ladder

I used what I have for plants that are going to vine (squash, pumpkin, cucumber & tomatoes–not yet planted in above pic.  I have a pallet for them to grow up on, a nearby fence, tomato cages, and a part of our old swing set turned on it’s side.  I will tie up the plants as needed, using strips cut from an old pair of tights I have or just use some jute.

I am eager to share with you how much the garden has already grown…the leaves of the plants in pics above are about 3 times the size already!  I will do a June garden update soon!

——–

What are you growing?  Is there anything keeping you from quality time in the yard?


Gardening/ Uncategorized

How To Use Fresh Mint — 20+ Ways!

HOW-TO-MINT

I decided to grow fresh mint as the focal point in two of my flower pots this year.  It is growing beautifully and I’ve been so excited to use it, but other than tea, I needed some inspiration.

New Nostalgia has an amazing & growing Facebook community.  I love being able to have real conversations with you all over there.  I knew if I asked them what to do with all my fresh mint that I would get some inspiration, and they totally came through for me!

NEW-NOSTALGIA-FACEBOOK-JOIN

Here are some of the great ideas discussed over there:

Jill B. — “With peas!!  A little olive oil, mint, and peas blended on toasted pieces of bread.  SO YUMMY!”

Amy V. — “I just love it in my water!”

Maggie R. — “I am drinking water with crushed mint” She also adds chiffonade of mint to fresh fruit, adds it to her coconut oil for washing her feet & wants to add it to a pitcher of water for a mint hair rinse.

Queen S.– “The leaves are pretty couple;ed with a strawberry half as decoration on a cake.  All around the sides if it’s a layer cake…I love my mint!”

Jessie F. — “I like to eat it with Thai food, drink it in water, tea, mojitos, use as garnish on watermelon, and in salads.”

Tracy H. — Strawberry & avocado salads with chopped mint and balsamic dressing.”

Dona P. — “I like mint pesto for chicken.  I use it just like basil–mint, pine nuts, a bit of Parmesan, a bit olive oil, a bit of garlic.  Add some acid (vinegar, lemon, orange juice) for a great salad dressing.  Also great with watermelon.”

Crissy F.– “Pack it into a water pitcher (the kind with a spigot in the bottom), add a sliced lemon, and fill with water and drink all day.  I often run out of mint in the summer and do the same with lemon balm instead.”

Heidi D. — “I put them in my smoothie for helping digestion.  My version is 3/4 unsweetened almond milk, 5-6 mint leaves, a tablespoon of flax, hemp & chia seeds, two packets of Truvia, two big handfuls (4 cups loose pack) baby spinach, half an avocado, 1/2 cup frozen cherries and 5 or so ice cubes. Tastes like a Shamrock Shake.  Also, use fresh mint in taboulleh salad, gyro sauce for chicken or salmon, and mint freezes well, too.”

Rachel K.– “Add to water, tea, lemonade.  I use it in my bath (like fresh lavender).

Ana T. — “Tea!”

Karin T. — “Mojitos! OR virgin mojitos if you don’t drink.  In a Vietnamese summer roll with tofu.”

JoAnne H. –“I freeze mint leaves in ice cubes with lemon and lime slices to put in my water throughout the summer.”

Kristy L. –“Mojitos!”

Andria H. — “Mojitos! And my kids pick and eat it right off the plants..fresh breath, that is, until they pick the green onions.”

Arn’t those great suggestions?  I love that Mojitos got 4 shout-outs. I love the idea of putting it on my watermelon, making a mint pesto/salad dressing, and LOVE the healthful ingredients in the Shamrock Shake. I also had to chuckle at Andria’s little ones and their breath!  I have the best community here at New Nostalgia,  it makes me so happy when we can all hang out on Facebook and chat together.  Come join us!

______

Girls-Flower-Pots

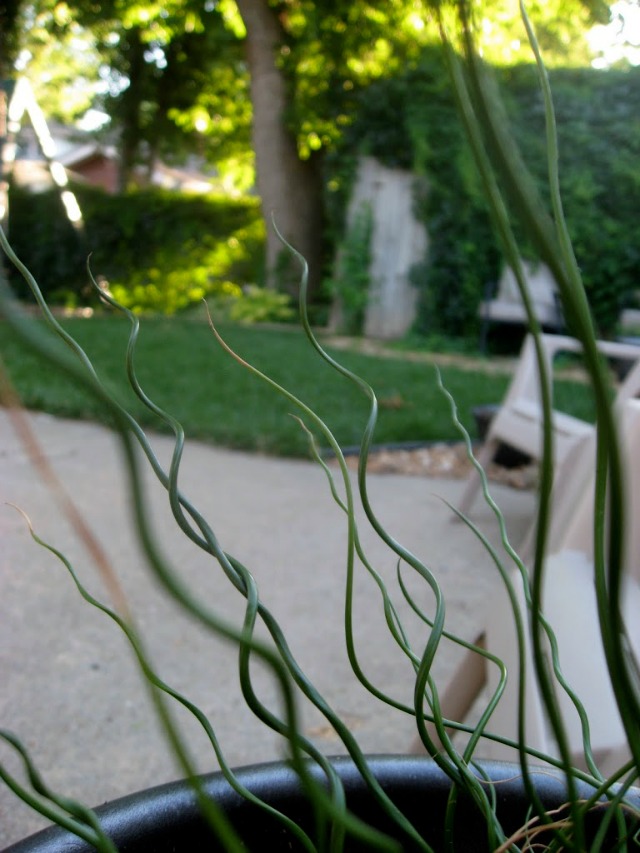
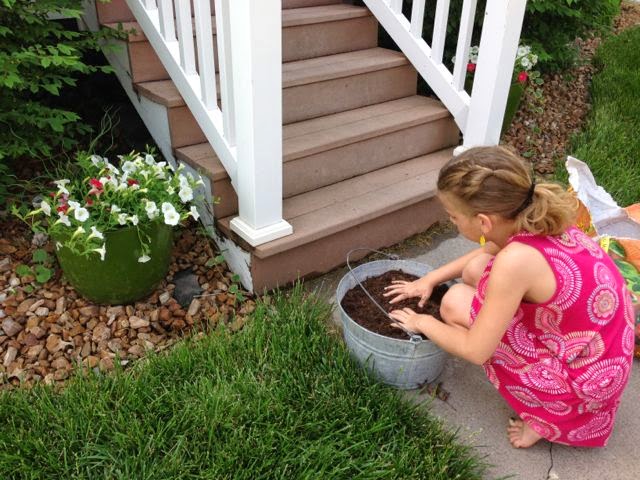
{my pots last year.  They were missing the fun height of mint}

If you end up using mint in your own pots or garden, be aware that it is a super invasive plant.  It loves to grow and take over all the other plants.  To help with this, you can keep mint in a pot and bury the pot in the garden.  If you are going to use mint in your flower pots along with other flowers, keep it in it’s own pot, or do what I did, which is buy a mint plant that is in a peat moss pot, and rip the bottom off, keeping the sides in-tact.  This will keep the mint from growing outward, and taking over the rest of the flowers in the pot.

2-Mint-Flower-Pots 

I told you it was fast growing!  These pictures were taken just one week apart, and that is even after I harvested some of the larger leaves for tea.

_______

What about you?  How do you use fresh mint?  Leave it in the comments and I might have to write a part 2!

FAMILY/ Gardening/ Kids/Family/ Uncategorized

Embracing A Small Yard & Making It Cozy

Outdoor-Slow-livingOur spring here in the midwest seemed to take forever to behave and warm up.  The last couple weeks are finally warming up and I’m loving every second of it.

Our yard is quite small which honestly I have grown to love and appreciate.  Keeping the yard looking nice is quite a chore, so I could not imagine having a big yard!  My mother-in-law loves the outdoors and has a huge serving heart, so she has been over many days the last few weeks getting weeds out of the rock area of our play set and in all our planting beds around the house.  She is amazing! Thanks to her work I have been super inspired to get out there and add my own touches to making the yard great.

I have embraced the tiny yard size and have been taking steps over the last few years, to making it a great family space, one with lots of atmosphere and coziness.  It is working, as our family is finding ourselves out their together more evenings than not lately.  This is such a great reward for me personally, as it is what I have dreamed of as I have slowly added elements to draw my sweet family outside to enjoy!

Here are a few things I have done over the last few years to make it cozy:

Water Feature– we had a bit of landscaping done when we moved in over 5 years ago.  I knew I wanted a small sitting area and I have always loved the sound of water.  I asked our landscape guys if there was a simple, inexpensive way to add a water element to our small backyard.  They knew just the thing and made it happen within hours.  Basically, they dug a 2×2 ft hole that was about 18-24 inches deep.  They lined it with thick black rubber lining & added a water pump in it.  They put a metal rack over the hole, so the pump stuck out of the top just a bit.  They covered it with 3 large stones and then scattered slate-colored river rock around those large rocks.  We had our electrician put an electrical outlet close to the fountain, and now all we have to do is plug it in.  I add one anti-algae tablet to the water each spring when we first start it, and that is it.  It is the most loved feature in our yard and makes the sound of a running brook.  I love the natural look of it, & I love how low maintenance it is. You can see it if you  scroll down to the image of stringed lights, it is in the left bottom corner.

{my 2 youngest  back in 2009 dancing and singing in the rain.  This video shows the chairs I talk about below. I talk about the pots and my love for funky plants here.}

Lots of Chairs–we bought a bunch of chairs at Target during one of their end of season sales.  They are a neutral color which I love because I can add any color pillow to them for color.  I bring color to my yard with pillows and flower pots.  We bought about 10 of them, knowing there would be times we would want seating for friends.  I made sure they stacked nicely before purchasing because our storage is limited and our garage is just a single car size.

Fire Pit–I’ve pinned a bunch of fun fire pit ideas on Pinterest, but have never gotten around to any DIY fire pit projects.  A year ago my daughter and I took part in Black Friday shopping at Target, and they had a crazy deal on fire pits that I could not resist.  I’m so glad I didn’t.  We have had many fun family nights sitting around that pit, roasting marshmallows for apple s’mores or just using it to warm us up on chilly spring or fall evening.

A Place to Set Our Drinks–I’ve dreamed of a table and chairs for us to eat outside as a family on, but that is just not in the budget or practical in such a small space.  We do have a single driveway connected to our backyard, but now it is used as a basketball court and a table and chairs would just get in the way.  I have let go of my dream for now, although I do have my eye out for a foldable table to set out on the driveway with an umbrella and foldable chairs.  Something we could store away easily and only bring out when we want to eat as a family outside.  For now, I make do with a small table used to set beverages on.  We often eat outside, just with our plates on our lap or on a spread blanket picnic style.

TikiCollage3

Hanging Lights--these are another fav touch of mine.  There is something so whimsical about a string of lights and the glow they bring.  It adds an instant atmosphere!  I just bought one set, but would love to add more!

Tiki-Torch-Flame

Torches–We have one table top torch that found at a garage sale, and my favorite torch sculpture that I wrote about here.  I love them both.  I keep oil on hand, but they really only need filled once a year.  We light them any evening we are out there.  Tiki makes a citronella oil that works really well to keep the mosquitos away, and the element of fire always bring coziness.  I love that I don’t have to make a pit fire every night to have the element of fire.  I have had to replace the wicks about once a year, but they are so inexpensive (less than $2!) and can be found at any hardware store or garden center.  I stocked up and always have them on hand.

Cozy Blankets— I have 2 blankets used only for outdoors.  One is a white, thick comforter that I use to lay on the grass.  It never fails, if I lay it out, within minutes there is someone with a book laying on it.  It is also great for when my niece and nephew come over to play.  We just lay there and look up at the leaves in the trees or gaze at the clouds.  I have another lightweight blanket for those nights that are chilly and the fire is not lit. I’ve been eyeing this great picnic blanket made for the outdoors with a waterproof bottom to keep you dry.  I love the colors in it.

Funky-Plant-3

Potted Plants &  Flowers–I keep this simple and minimal. Years ago I spray painted some cheap plastic pots with Hammered Black Spray Paint by Krylon-made for plastic. They are lightweight and look great. Right now I fill my pots with annuals every year, but I am wanting to take a couple and put some perennials in them.  I don’t like spending cash on flowers that are going to die every season, and if the majority of my pot is made of a perennial, then I can add a touch of color with some annuals which will really cut down on the cost each year.

Playset{the only photo I could find of our swing set, from last year}

Swingset--we have kept our swing set even though it takes up the majority of our yard.  My 11 year old still plays on it.  Just a couple weeks ago she and 4 friends had a fun picnic up in the tower of it.  I also have a 1 1/2 year old niece and a 4 year old nephew who adore it , and even the sand box gets used when they come over.   I even find my big girls sitting on a swing while on instagram or reading their kindle, so it is worth it.  We paid a pretty penny for it over 12 years ago when Teagan was a young.  It has held up beautifully over the years and I am glad we invested in a quality set. (Childlife Playsets)

Unknown

Basketball Hoop–I know, I know, the sound of balls bouncing isn’t quite cozy, but this hoop definitely has added to the coziness we feel as a family in our back yard.  Maybe coziness is not the best word.  Maybe togetherness is better.  Regardless, even though we didn’t have a huge driveway and a bigger space would be ideal for basketball, we make do with the single car driveway and it has worked out just fine.  I have you all to thank for our hoop as it was purchased with money I made last year from sponsored posts.  If you all didn’t support this blog by reading it, we would not have a hoop!  Thank you sweet readers.

———

As you can see, even in a small yard it takes time to make it what you want it to be.  Each spring season I try to add a little something, always keeping in mind to keep things simple and meaningful.  When I invest into our little yard to make it cozy, I am investing in an area where slow living as a family can take place.  THAT, my friends, is priceless!

DIY/Crafts/ FUN/DIY/ Gardening

How To Make A Fairy Garden

This fairy garden was one of the most fun projects I have done with my girl.  We did it about a year ago, and she is already asking if we are far enough into spring to make another one!  
She is already getting creative and finding things around the house to put into this year’s fairy garden. My Avery doesn’t really believe in fairies, (she wanted to make sure I let you all know that) {grin} but it is very fun and magical to pretend.  I loved that this project gave me precious time with my girl, as took a little planning & a fun date to buy plants.  I also loved teaching her a bit about gardening.
We started looking online for some different ideas for a fairy garden. Now, this is where perfectionist might set in.  There are some amazing miniature gardens and fairy gardens online, so use them for inspiration, but don’t allow yourself to get intimidated.

I challenged Avery to get creative and told her I only wanted to spend money on planting soil and plants.  The rest needed to be created by her.  She did such a great job, and even though a couple things she made were not weather proof–paper and stickers– they lasted a long time and was not a big deal to remove once they were spent.  

I also gave her lots of freedom to make the project her own, and encouraged her to get her hands dirty and do most if it all by herself.

We bought plants that would add texture.  A tall fern-like plant that added height & movement when the wind blew, a mossy type low-growing ground cover that would spread and fill in, a medium height plant whose leaves had a soft, white fuzz on them, and a few flowers for color. 

Avery made a fairy house out of Lincoln logs and covered the plastic roof piece with fun patterned duck tape.  She made a mushroom and lady bug out of clay and painted it, and a few stones out of clay which she sprinkled with glitter for a bit of fairy dust sparkle.  She also broke some wooden coffee stirrer sticks and colored them with marker to make a fence.

She placed her larger items first, and made a path with rocks and sparkly clay stones.  She added the low-growing ground cover type plant.

She then added the tall plant for added height toward the back by the fairy house.

She then filled in with the flowers.

She added the coffee-stirrer stick fence along the rock path.  By the way…fairies don’t need a door according to Avery.  

 Avery was very proud of her creation.  We kept it on our front porch in plain view so we could enjoy it and so Avery would be reminded to water it.  It was great fun to watch it grow and see the plants spread out and fill in.

How To Build A Fairy Garden
~1 large container with drainage holes in the bottom
~rocks or gravel to put in the bottom of container for drainage
~potting soil
~a fairy house (get creative–a small birdhouse would work, or glue wooden blocks together)
~decorations that are waterproof and sparkly! 
~wooden sticks to make a fence
~stones
~glitter
~plants (one tall, one medium, one low growing, some flowers.  Make sure they are all annuals & take the same amount of sunlight)
———
1. Put gravel or rocks in the bottom of container.  
2. Add potting soil.  
3. Add fairy house
4. Make a path with rocks
5. Add low growing plant
6. Add tall growing plant toward the back of container.
7. Add medium plant and flowers.
8. Made a gate with the sticks
9. Add the rest of decor
10. Sprinkle with fairy dust.. aka glitter
11. Water
(and Avery :))

Top